앱을 못 만드니까 WebView라도 만들자 : )
TL;DR
postMessageonMessage를 활용해서 통신하자- RN → Web : RN에서 Web JS 실행 방법
injectedJavaScript: WebView Loading js코드 실행injectJavaScript: RN에서 WebView로 JS코드 실행시킬때
- Send/Receive Message (Only String type!!!)
- Send (Web ←→ RN)
postMessage: method를 활용해서 Message를 보낼 수 있다
- Receive
onMessage(RN)window.addEventListener('message')(Web)
- Send (Web ←→ RN)
- RN → Web : RN에서 Web JS 실행 방법
<Iframe>,window.open통신하는 방법이랑 유사하다!!!
1. React(JS) ↔ Native
기존 Webview(v0.60부터 Deprecated) 대신 react-native-webview 를 사용
이쁘게 위치 시키기 위해
<SafeAreaView/>를 사용하자
yarn add react-native-webview
pod install //ios
WebView에 js를 주입(실행) 시켜주려면
스크립트 끝에
true;?!! 오류 발생하는것을 방지(공식 문서)
-
injectedJavaScriptProps활용하면, WebView를 실행하기전에 스크립트를 실행!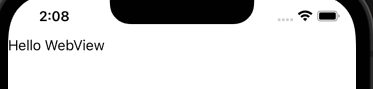
// RN
const App = () => {
    const runFirst = `
      window.isNativeApp = true;
      true;
    `

    return (
        <SafeAreaView style={{ flex: 1 }}>
            <WebView
                source={{
                    uri: 'http://localhost:3000/',
                }}
                injectedJavaScript={runFirst}
            />
        </SafeAreaView>
    )
}

// Web
const Web = () => {
    return <div>{window.isNativeApp && 'Hello WebView'}</div>
}-
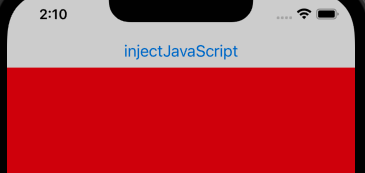
injectJavaScriptMethod를 활용하면 실행중인 WebView를 확인 할 수 있다.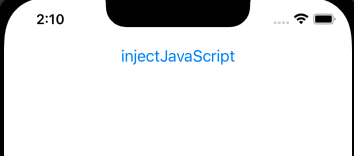
// RN
const App = () => {
const runJS = `
document.body.style.backgroundColor = 'red';
true;
`
const handleClick = () => {
ref.current.injectJavaScript(runJS)
}
return (
<SafeAreaView style={{ flex: 1 }}>
<Button title="injectJavaScript" onPress={handleClick} />
<WebView
source={{
uri: 'http://localhost:3000/',
}}
/>
</SafeAreaView>
)
}
// Web
const Web = () => {
return <div></div>
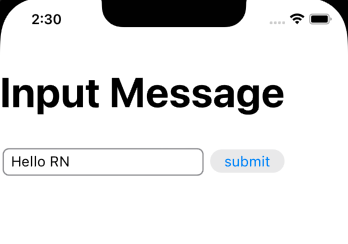
}Web에서 보낸 메세지를 받아보자
-
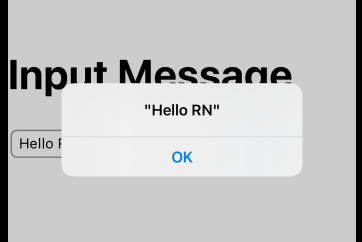
onMessageProps를 활용해서 Messge를 수신const App = () => { const handleMessage = (event) => { const { nativeEvent: { data }, } = event Alert.alert(data) } return ( <SafeAreaView style={{ flex: 1 }}> <WebView source={{ uri: 'http://localhost:3000/', }} onMessage={handleMessage} /> </SafeAreaView> ) } -
WebView가 호출되면서, window 네임스페이스에 WebView객체가 추가(
window.ReactNativeWebView)- postMessage Method를 활용해서 Message를 보낸다
- 중요!! 보낼 수 있는 Message의 타입은
string뿐이다
const Web = () => {
  const [input, setInput] = useState('');

	const handleChange = ({ target: {value} } ) => {
    setInput(value)
  }

  const handleSubmit = () => {
    if(window.ReactNativeWebView) {
      window.ReactNativeWebView.postMessage(JSON.stringify(input))
    }
  }
  return (
    <div>
      <h1>Input Message</h1>
      <input value={input} onChange={handleChange}/>
      <button onClick={handleSubmit}>submit</button>
    </div>
  )
RN에서 보낸 메세지를 받아보자

-
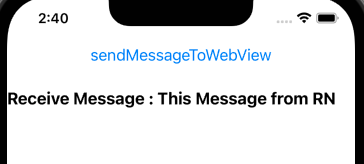
postMessage를 통해 WebView로 발신const App = () => { const ref = useRef() const handleClick = () => { ref.current.postMessage('This Message from RN') } return ( <SafeAreaView style={{ flex: 1 }}> <Button title="sendMessageToWebView" onPress={handleClick} /> <WebView ref={ref} source={{ uri: 'http://localhost:3000/', }} /> </SafeAreaView> ) } -
window.addEventListener('message')를 활용해서 Message를 수신const Web = () => { const [message, setMessage] = useState('') useEffect(() => { window.addEventListener('message', ({ data }) => { setMessage(data) }) }, []) return ( <div> <h3>Receive Message : {message}</h3> </div> ) }
2. Iframe / window open 통신방법
Iframe
// 발신
$iframe.contentWindow.postMessage(value, 'http://localhost:3000')

// 수신
window.addEventListener('message', (e) => {
    if (e.origin !== 'http://localhost:3000') return
    console.log(e.data)
})
popup(window.open)
// 발신
const openPopup = window.open(
    'http://localhost:3000/child',
    'popupWindowName',
    'popup=1'
)
openPopup.postMessage(value, 'http://localhost:3000')

// 수신
window.addEventListener('message', (e) => {
    if (e.origin !== 'http://localhost:3000') return
    console.log(e.data)
})
참고
- https://github.com/react-native-webview/react-native-webview/blob/master/docs/Reference.md
- https://github.com/react-native-webview/react-native-webview/blob/master/docs/Guide.md
- https://jonghyucklee.github.io/2021/09/09/RN-webview-exchange-data/
- https://developer.mozilla.org/en-US/docs/Web/API/Window/postMessage